Collagraphy: The Basics
Despite being around since the 1960s as a coined term for mixed media printmaking, collagraphy still intrigues many.
"What is a collagraph?" is a question I get asked a lot.
Below are some pointers to help you understand and appreciate this lesser-known printmaking technique.
The term "collagraph" was first coined by an American artist who was experimenting with new printmaking techniques in the 1950s. His name was Glen Alps (1994 - 1996). Alps was born in Colorado but gained a Master of Fine Arts and taught for 37 years at the University of Washington, Seattle.
His term describes a type of printmaking whereby the printmaking plate is glued with various textured materials. The French verb "coller" means "to stick/glue" and this is fundamentally what a collagraph is: a print taken from a collaged base.
Artists and printmakers were applying ink and taking prints from textured surfaces before Glen Alps coined the term collagraphy. For example, prints onto paper had already been taken from engraved stone or plaster reliefs. It was Alps who wanted to explore further and he coined the phrase collagraphy to describe what he was doing.
Collagraphy found its soulmate in abstraction. Abstract art sprung to life in the turbulence of the early 1900s. Artists, musicians and writers all felt the urge to create in ways that reflected the upheavals taking place around them. The two world wars in Europe disturbed society's psyche and artists who no longer wanted to depict an ideal classical world which no longer felt relevant chose to break free from tradition. Artistic movements such as Cubism, Expressionism, Surrealism and Dadaism all embraced radical ideas and enjoyed this sense of artistic freedom.
When new stronger glues were invented in the late 1940s, artists then began to stick "Found" objects on their work. It wasn't long before artists tried covering the textural mixed media surface of a canvas or board with ink and taking a print from it.
Collagraphs are predominantly intaglio prints. That is to say, the ink is worked into the crevices on the plate. Its the same inking technique used for etchings. The term "intaglio" comes from the Italian verb "intagliare" meaning to carve. 15th century Italian printmakers were reputedly the first to ink and print from metal plates etched by acid, possibly inspired by a weaponry technique whereby swords were dipped in wax, patterns were scratched in, then dipped once more to etch the pattern onto the metal. In contrast to relief printmaking, where ink is rolled onto the top surface of the plate and the grooves are left blank when printed on paper, intaglio prints rely on the ink left in the crevices to provide the printed image.
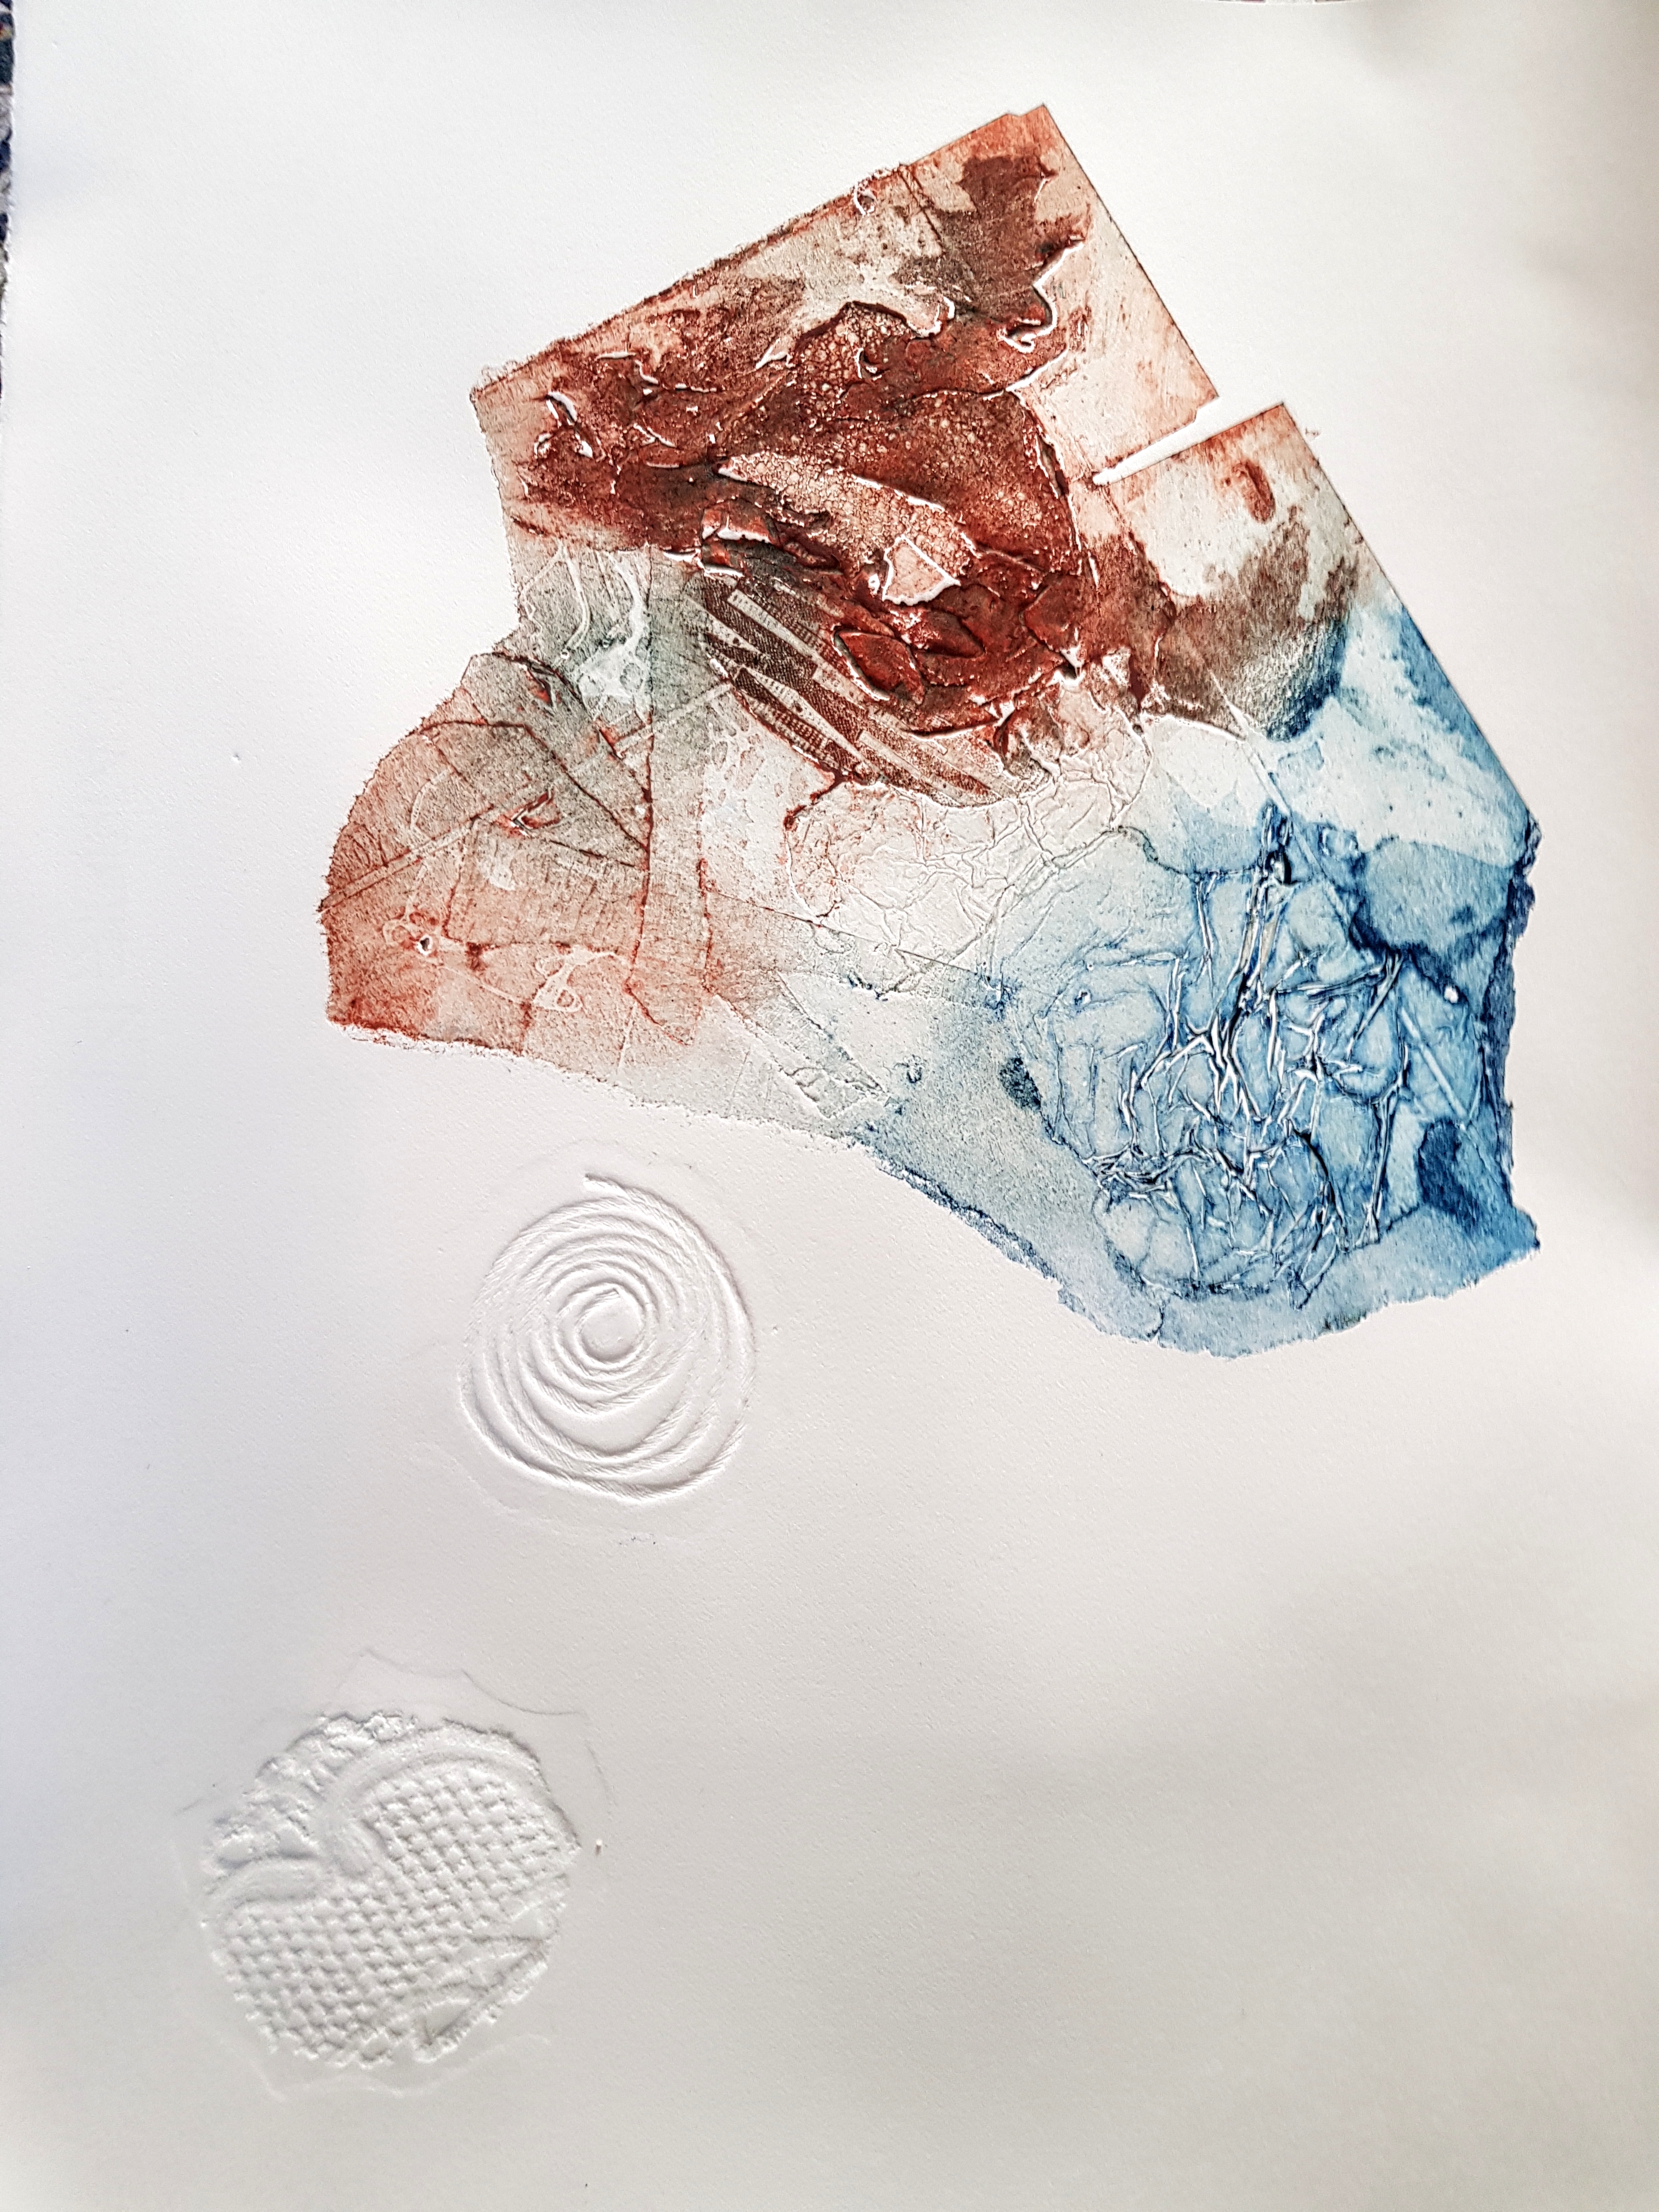
Collagraphy has been evolving since the 1950s. It has gained a reputation for being perhaps the most experimental printmaking process, thanks to the efforts of printmakers prepared to push boundaries with the type of printing base and collage materials they're using. The beauty of a collagraph is in the embossed paper, created by the "bumpy" surface you've created on the printing plate, and how everyday materials can be upcycled to look like something completely different. Whether you're a printmaker who just loves inking abstract textural surfaces, or one who loves the challenge of making scrunched tissue paper look like a tree, collagraphs are fun and surprising.
Constructing a collagraph plate
There are no hard and fast rules about how you construct a collagraph plate.
Some use thin plyboard, but it seems that a thick card suits most collagraph printmakers really well. Materials are often chosen for a "trial and error" approach! I have remained loyal to mount board as my preferred base, for several reasons. Recently though, I have started to experiment with thinner cardboard from cereal boxes. The thicker the base you use, the more sturdy it is, and the more prints you'll be able to pull (referred to as an "edition"). If your intention is to edition 30 prints from one plate, you'll need to consider your base and collage materials carefully to ensure they stay intact for long enough to allow that many. Each collagraph in an edition is inked individually by hand, which means a lot of rubbing over the surface. This can dislodge anything fragile you've stuck on.
So, using a good glue is important. I'm not sure how anyone coped before PVA was invented - it's the glue of choice for most printmakers making plates for collagraphs. Not only does it stick most things onto the base really well, but it also provides a really nice tonal effect in the print itself.
Texture, Tone and Line
These are the three elements I consider when planning a new collagraph. As I said before, all printmakers approach it differently. One approach is to cover the whole base with items you've glued on (straightforward "collage") and focus on the texture or pattern those materials will create on the paper when inked. This seems to be how many collagraph printmakers start out, and it's a good way to find out how each material behaves. It's not long before you build up an arsenal of favourite items you like to use when building plates for texture and pattern. My top five are: tissue paper, masking tape, embossed wallpapers, string, and lace. I have also successfully used: foil, couscous, Polyfilla, fabric, Sellotape and a whole lot more!
The second element to consider is "tone". How light or dark do you want each area of your plate to print? Materials with a rough surface will hold the ink when you wipe away during the intaglio method, whereas materials with a shiny surface will wipe away clean. PVA glue is perfect if you want to create a light area, and you can paint it onto the base like a paint instead of merely using it to stick other items on. For a dark tone, I like to peel away the top layer of mount board, because underneath the smooth top layer there is a fuzzy second layer which holds ink really well.
It's worth sketching a composition on paper first and shade the areas you want to be dark. When you build the plate, remember to select rougher materials for that shaded area to give the desired darker tone. For non-shaded (desired "white" areas), look for smooth materials that will wipe clean, or just paint on PVA glue. If using mount board as your collage base, if you leave it bare, when inked it will print as a mid-tone - a bit counter-intuitive, I know!
Collagraphs don't have to be abstract! Landscape and Still Life are both good marriages for collagraphy, but I also enjoy the challenge of depicting animals and birds too. Anything goes, and it's up to you how you want to achieve it using materials at hand.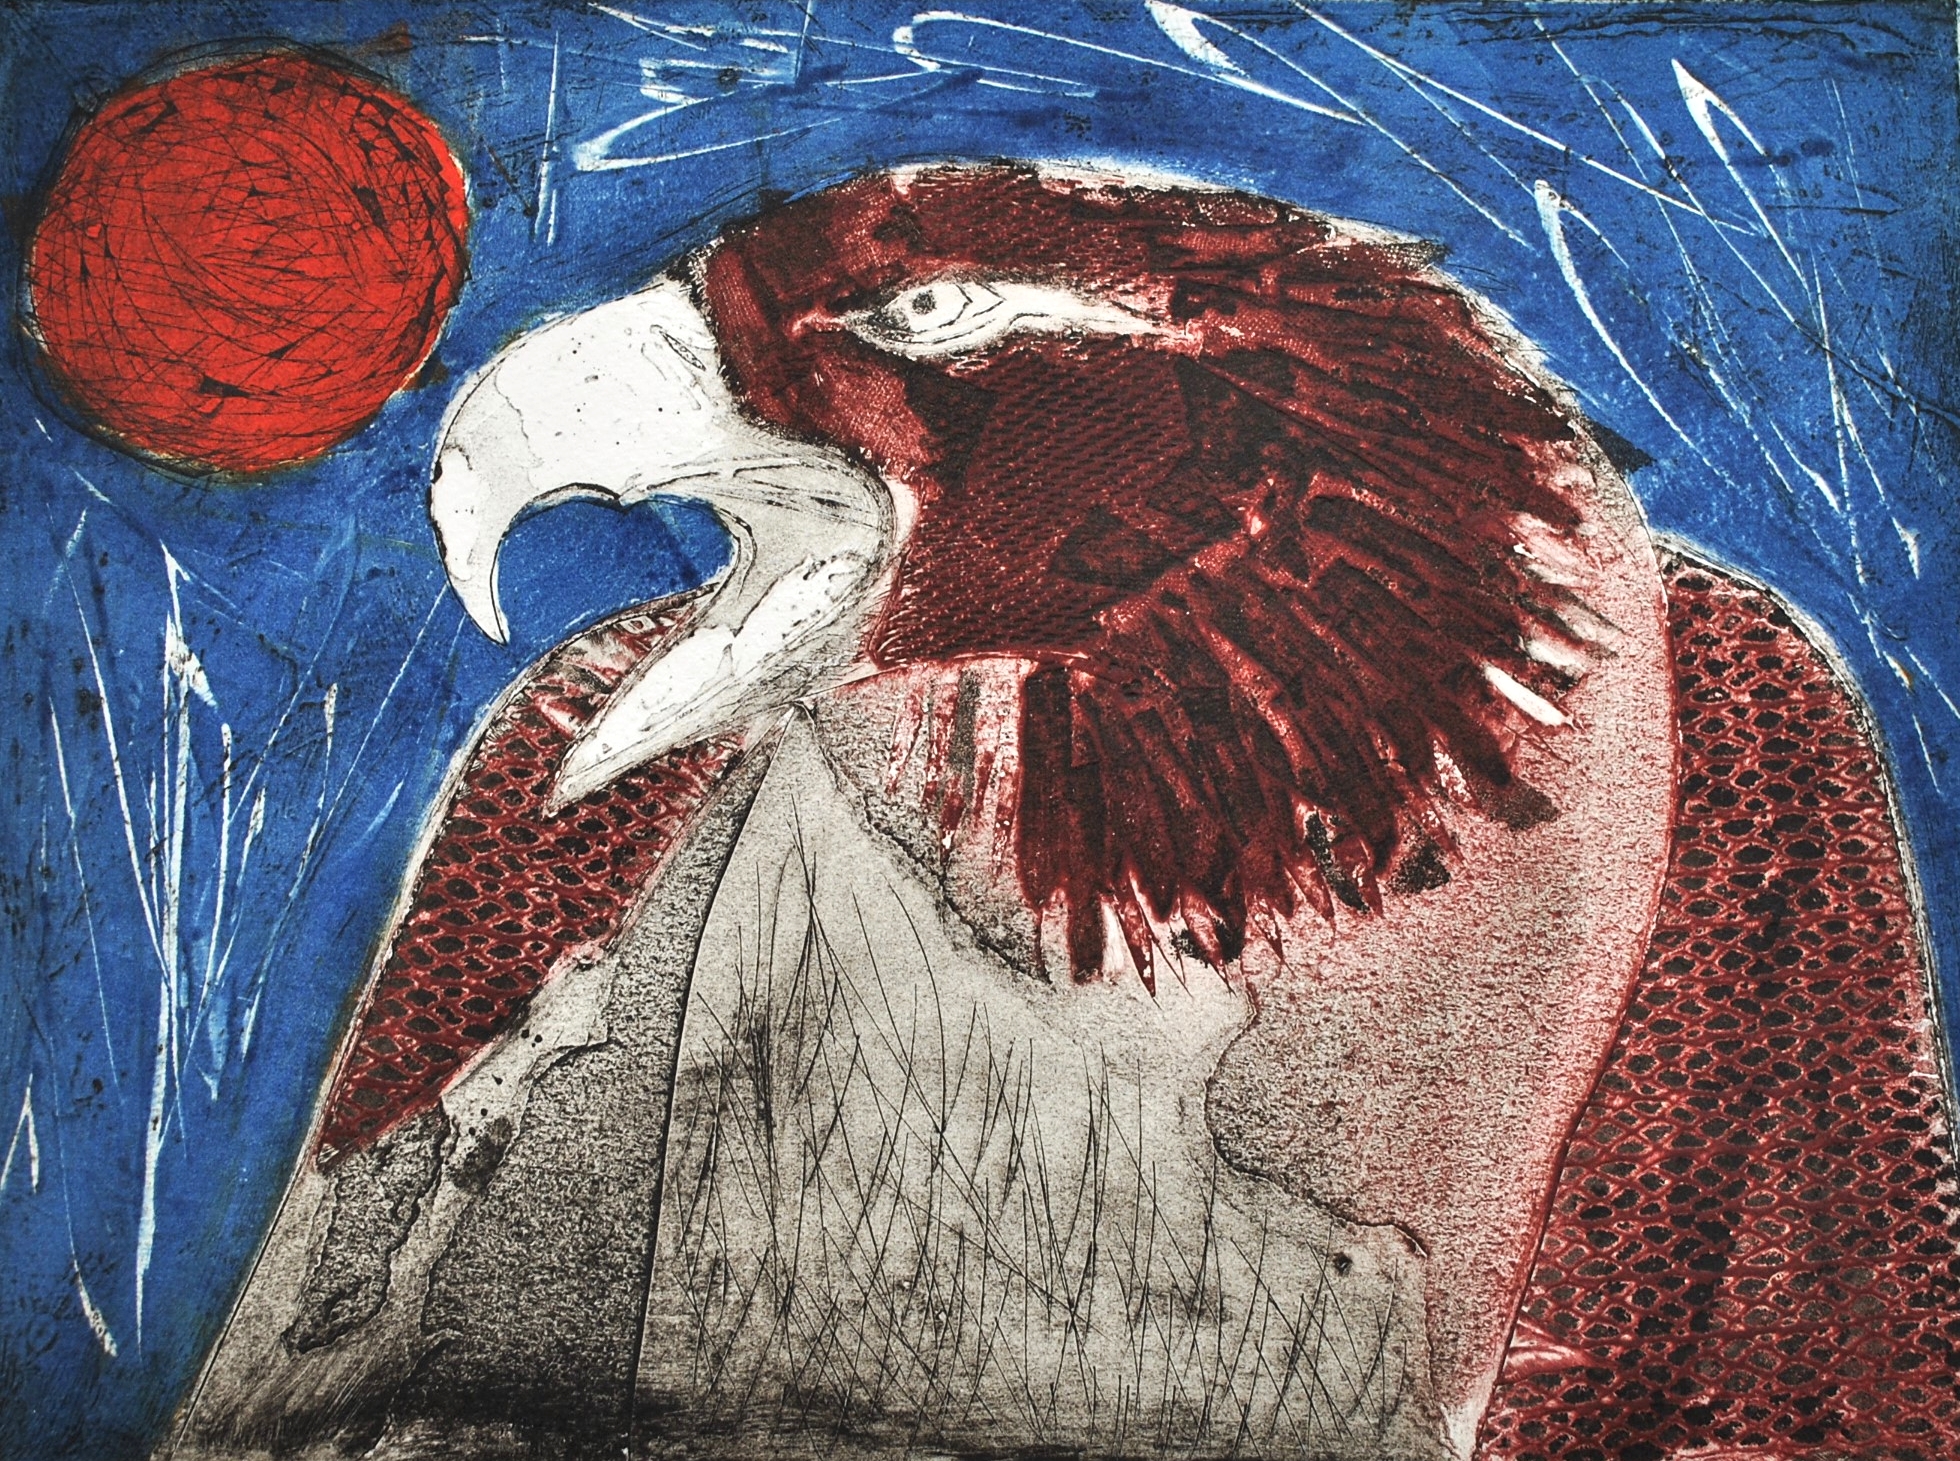
Eagle 1, original collagraph by Genevieve Lavers
As with any artistic technique, there are limitations. Collagraphy is no different, and perhaps the most obvious challenge is "line". Line is important for delineating and creating recognisable forms. In painting and drawing, a brush and a pencil will do this for you. In collagraphy it is the surgical knife! Using a knife to score into the top surface of mount board will provide a printed line very similar to an etching. Knives aren't as easy to handle for curved lines, and practice makes perfect. Even the thinnest scored line will print clearly on paper if you have an intaglio press. The other way to emphasise shapes and outlines is to use cut-outs and glue them on. The raised edge of the glued cut-out will provide a small crevice for ink to sit, and this will be a line on your print. I like to vary knife-cut shapes and ripped shapes.
Before Inking
Once you are happy with your collaged base, and the glue is completely dry, you will need to varnish it. Purists use shellac varnish because it's fine enough not to clog all those lines and crevices you've been at pains to add to your plate. Button Polish is much cheaper, contains shellac, and works just as well. Shellac can be bought in dried flake form and dissolved into liquid form using turpentine in a jam jar. Paint an even layer over the plate with a large DIY brush. You can buy ready-diluted Shellac varnish in bottles. Leave the varnished plates to dry for at least a day before moving on to ink them. The varnish will protect the glued materials and ensure ink doesn't soak into them.
Inking
The ink I use for my collagraphs is highly-pigmented linseed-oil-based etching ink, which is lightfast. There are etching inks available which are not oil-based, and may work just as well. There are other sundries you need for applying ink onto a collagraph plate: scraps of tarlatan (known as "scrim"), squares of newsprint and tissue paper, a toothbrush and some cotton wool buds.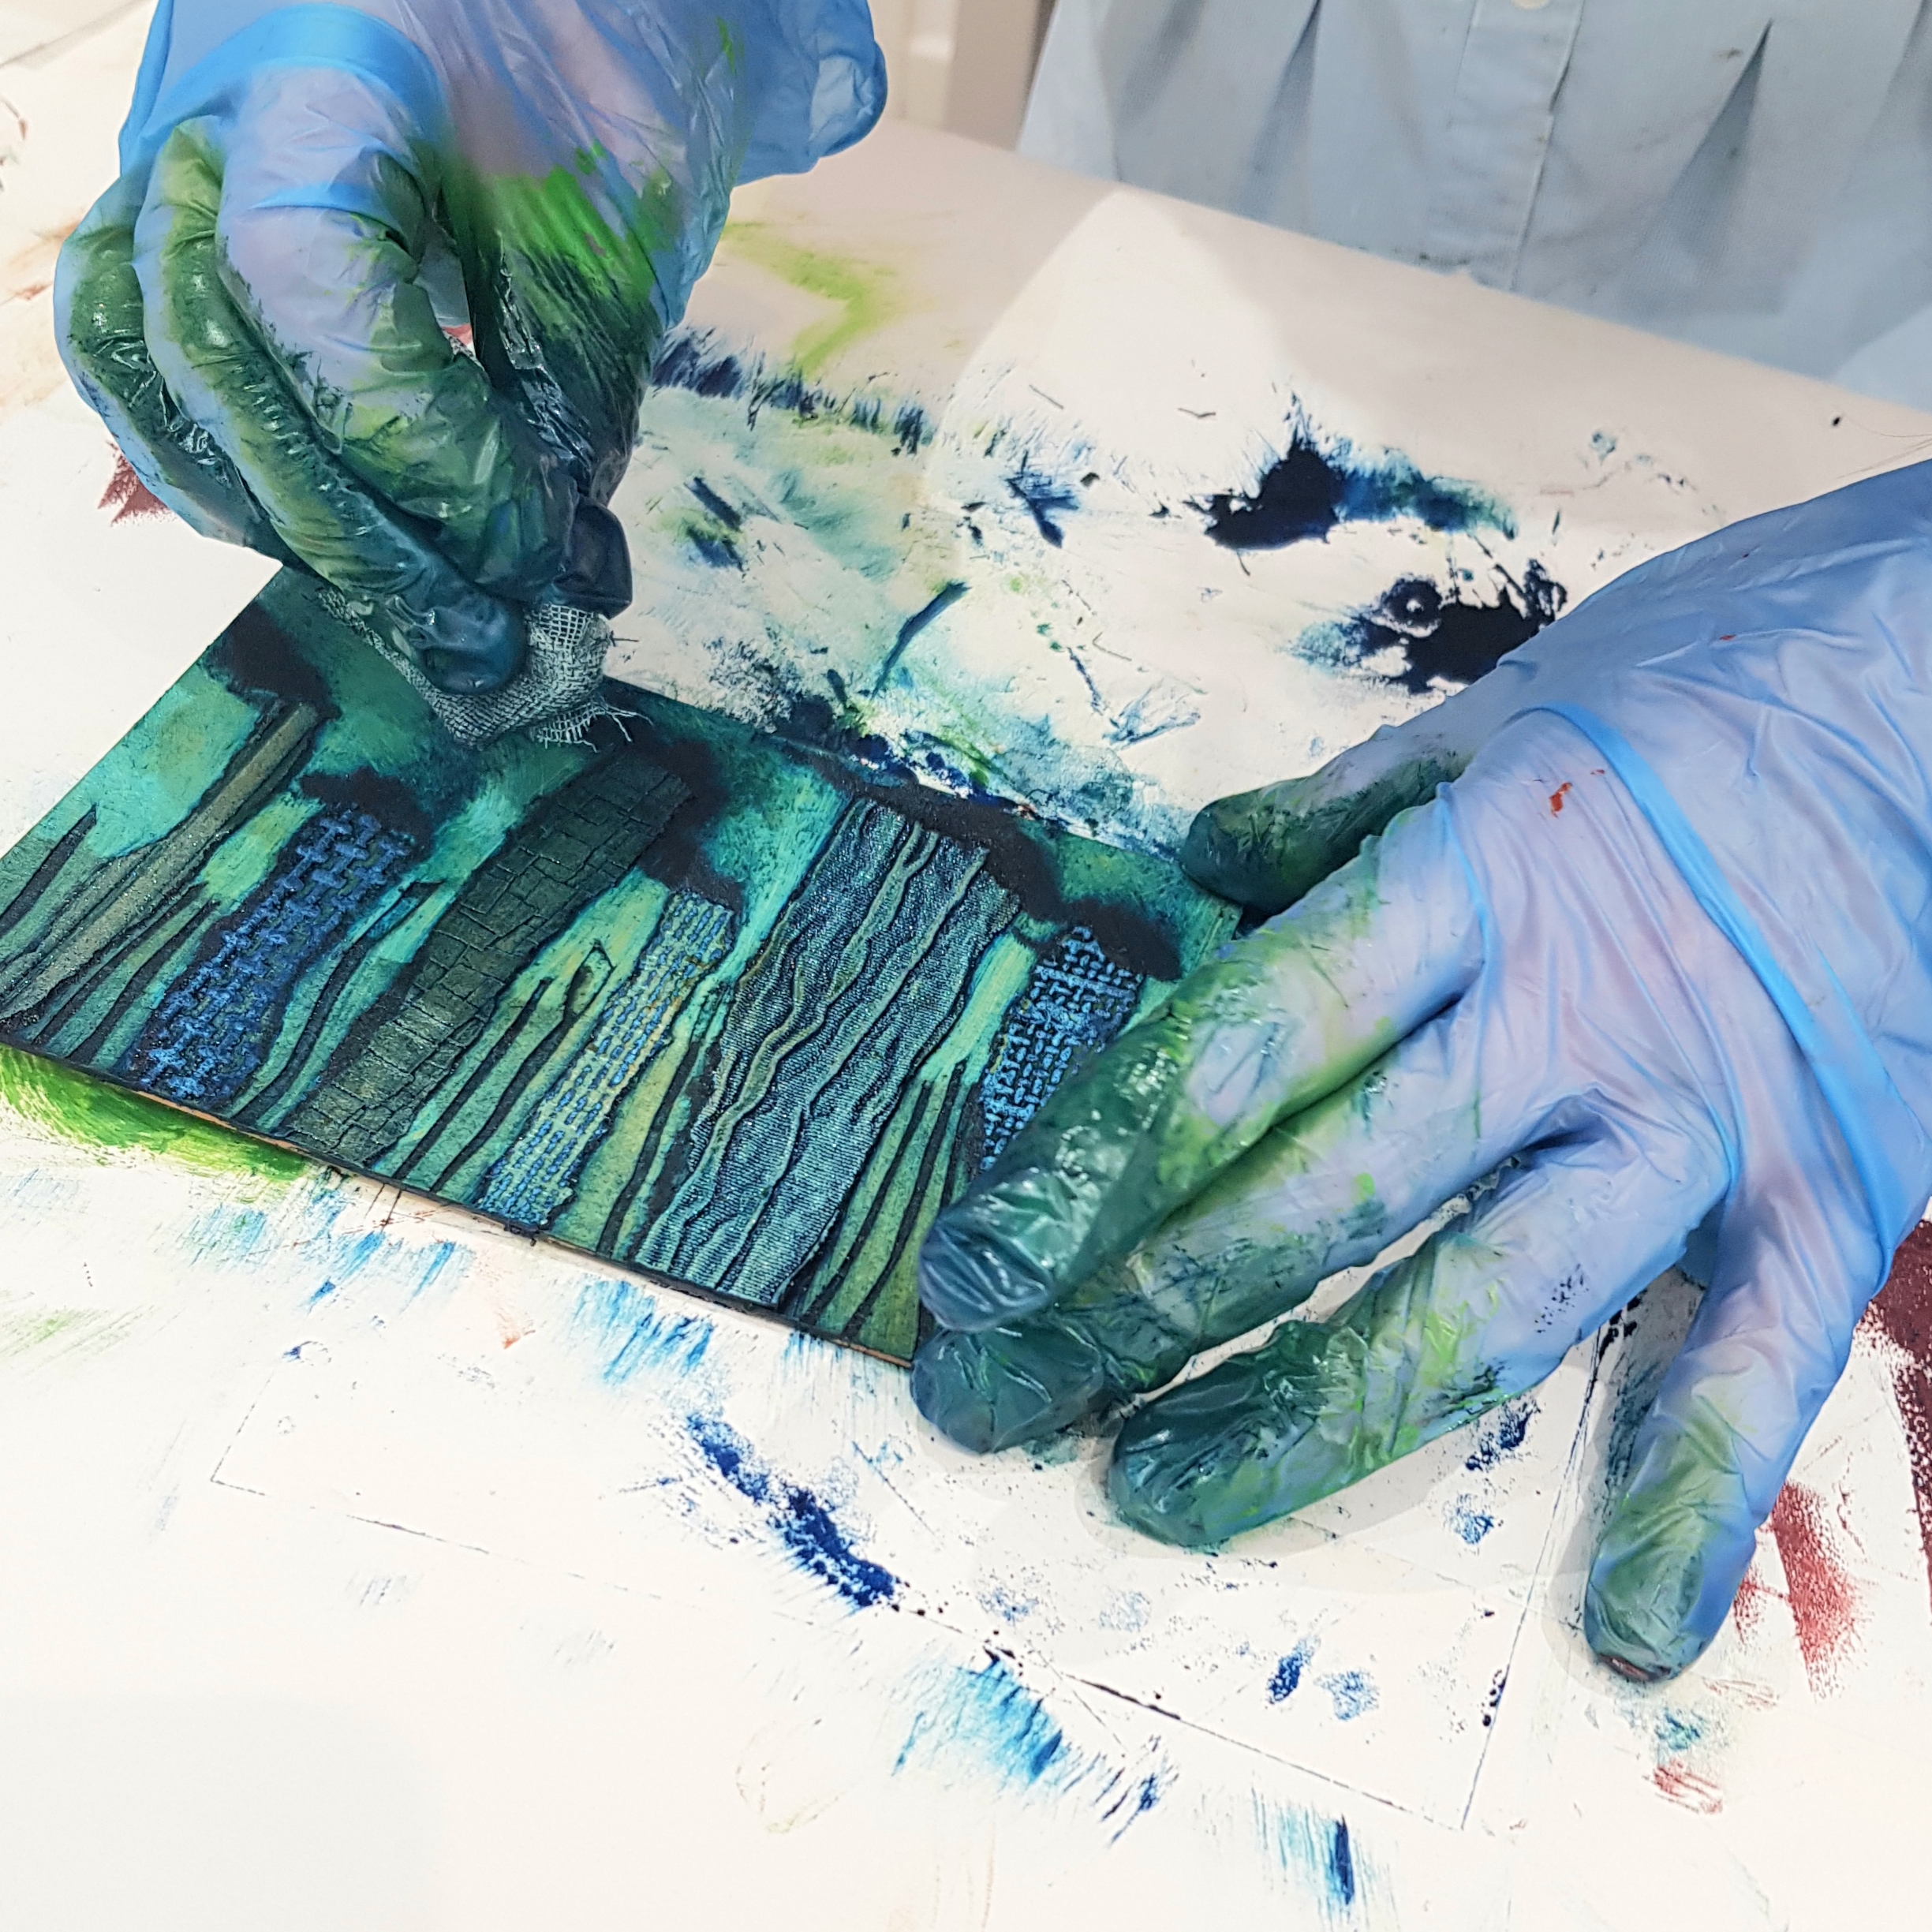
Inking a collagraph plate by hand, using the intaglio technique
You need to use a paper which has a high cotton content. This will give it extra strength when wet and being pressed over the raised surfaces. The paper is soaked and blotted before being placed over the inked plate.
You need an intaglio press, which has a roller designed to squeeze out the ink from the crevices. It operates a bit like an old-fashioned mangle. Here's mine: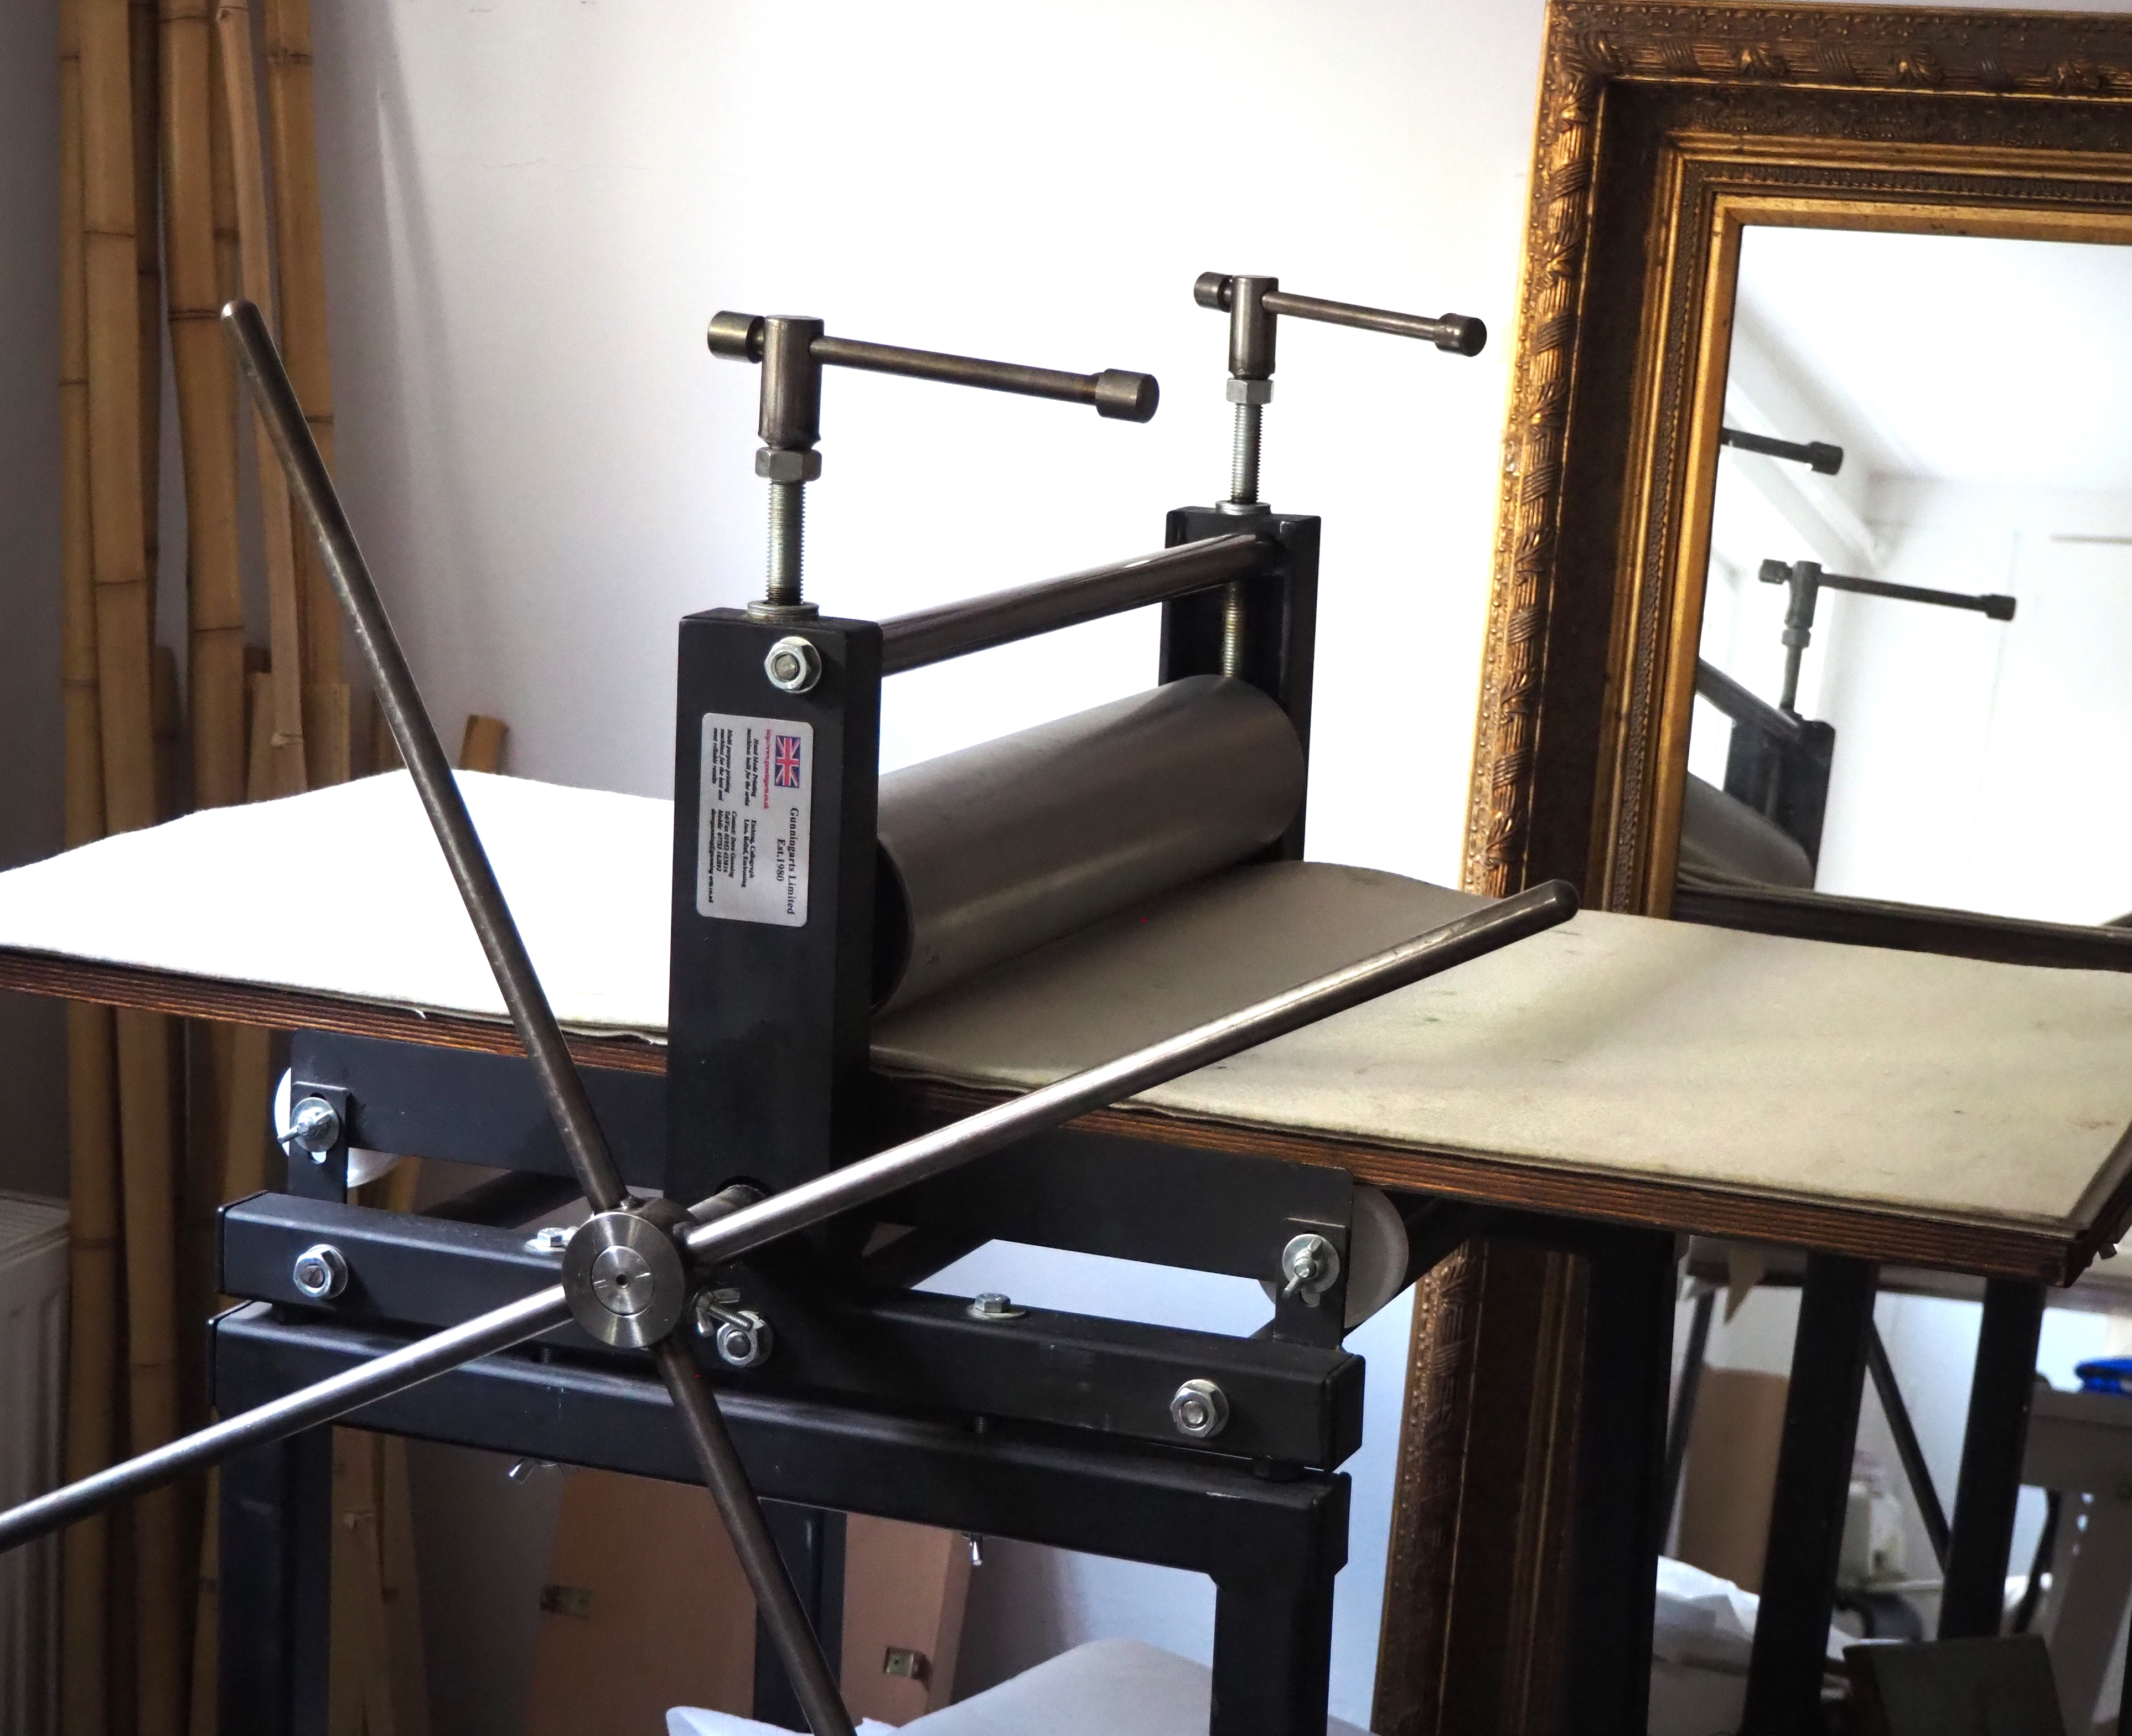
The best part of collagraphy is peeling away the paper from the plate to see the result. I never get tired of it. There's always something I'm not satisfied with, but I also have many happy surprises. Enough to keep me continuing on my quest for the perfect collagraph!
Here's a good time to mention editioning. If you want to keep inking the same plate several times, you can build up an edition. The number you print is up to you. Once you've numbered your print 1/30 for example, you must not print more than 30. I tend to print around 10 or 15, as I don't have space to store piles of prints. The value of a print will go up for a smaller edition. Collagraphs are ORIGINAL prints, that's to say they aren't printed using a digital printer - just elbow grease and imagination!
Conclusion
This article explains the processes involved in collagraphy at a basic level. Hopefully it has informed you sufficiently to view collagraphs in exhibitions and online with appreciation for the work that's gone into them.
Disclaimer: I am not a historian and make no apology for inaccuracies in writing about events which may have led to the use of collagraphy as a recognised printmaking technique. I seem to have gleaned information from a plethora of sources over the years. If you are interested in this area of art history, there are authors who have dedicated more time to it. I would recommend the following book:
"Collagraphs and Mixed-Media Printmaking", Brenda Hartill and Richard Clarke, A & C Black Publishers Ltd, London, 2005.